Welcome to part two of my Photon Unity Networked Game tutorial. In this part we are going to put in the place the basics to allow us to create or join a networked game.
Disclaimer: There are many solutions to any one given network game design, which will differ greatly due to a number of factors, including but not limited to, target audience numbers, security concerns and whether you are programming for fun or commercial gain.
Therefore, I do not suggest that is this the only approach you might take, or that this is even the best one, rather it is my attempt to demonstrate some core concepts in as clear and concise a fashion as possible, which can be used as a stepping stone into the often murky waters of networked game programming.
Part 2a – Connection to the Photon Cloud service and creating a game session
Having configured our project to work with Photon (in part 1 of the tutorial) our next step is to set up the initial scene which we will use as our entry point into the game. So we’ll save the current scene and call it Main Scene.
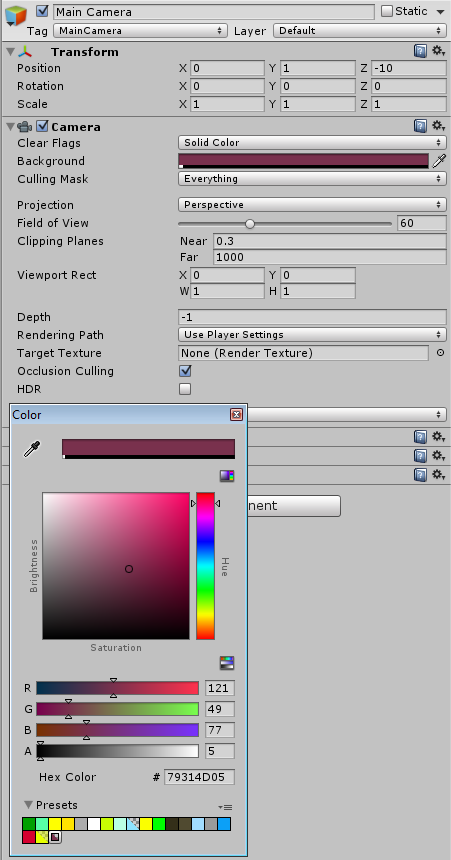
Next let’s change the camera background, because we don’t need a skybox for the menu. So change the Main Camera clear flags to ‘solid color’ and set a suitable background colour, something like so:-
Next we’ll add an empty GameObject to the scene and call it GameManager.
Now make a new folder Assets\GameManager and create a new c# script in the folder and also name it GameManager, then drag this script onto the GameManager object in the hierarchy.
The GameManager is going to be a Singleton object that doesn’t get destroyed when the scenes change, so we’ll define it initially as follows:-
Open the GameManager script and copy the above code into it, replacing what is already there, then save the script.
One important thing to note is that it is defined as a Photon.PunBehaviour rather than a Monobehaviour. The reason for this is that it will give us access to Photon Unity Networking functions and overrides, which we will be using later in the tutorial.
Having created our GameManager, it’s first job will be to connect us to the Photon Cloud. The Photon Cloud is essentially a collection of PCs running Photon Server, all of which are maintained and controlled by Exit Games. Once connected to the Photon Cloud, you can join a session of the same game being hosted by someone else, or you can host your own game session which other people can join. One of the benefits of using the Cloud is that you don’t need to worry about firewalls and port forwarding to make your game visible to other players. Bear in mind however that you do need an active internet connection to play multiplayer with Photon Cloud, even if all players are on the same LAN.
So we can connect to the Photon Cloud by adding this simple Start() function to the GameManager script. This is necessary because until we are connected to the Photon Cloud we can’t create or join any networked games:-
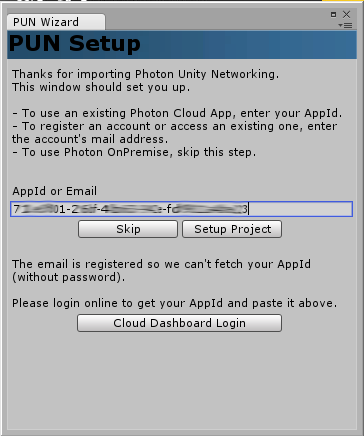
This simple bit of script uses the information from the server settings asset you configured in the previous part of the tutorial to connect to the Photon Cloud with our AppID and other pre-set settings. The only bit of additional information it needs is the game version string, in our example we use “PUNTutorial_Pt1”. Users are separated from each other by the game version, which means you can make changes to your game which aren’t compatible with previous versions, and as long as you update the game version string your users won’t be able to connect to an incompatible game.
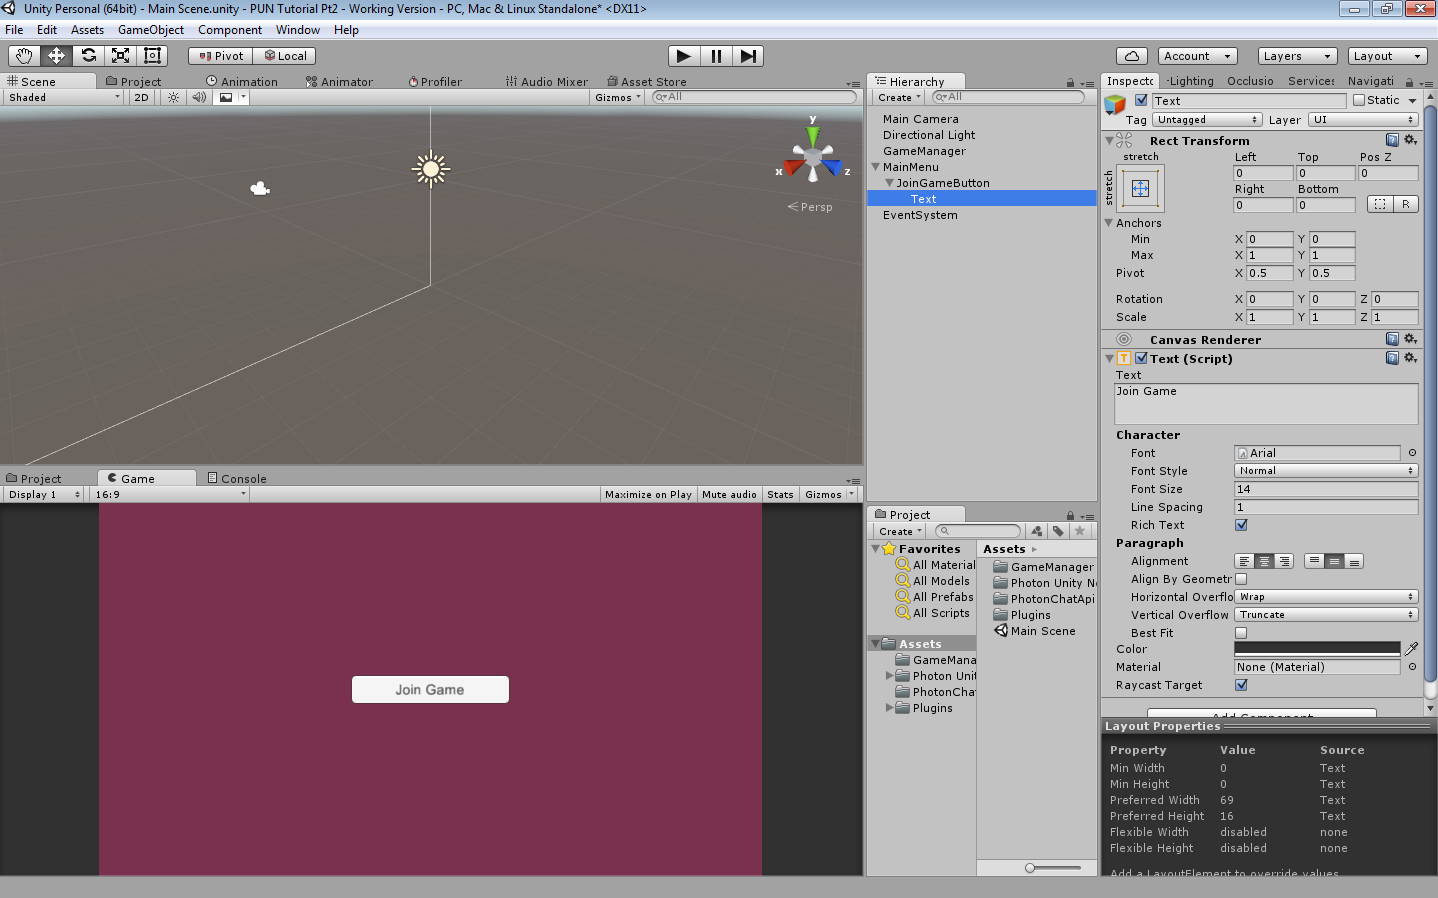
Now we need a way to create or join a game, and for this we will create a Join Game button. So add a canvas to the Hierarchy and then add a button. Call the canvas MainMenu and the button JoinGameButton, and change the button’s text to ‘Join Game’.
Having done all the above, this is how your editor should look:-
Now we’ve got our Join Game button, we need to hook it up so that it actually does something. So we’ll add the following function to the GameManager script:-
In this function we use the Photon JoinOrCreate function, which when executed, searches for a room with the specified name (in our case ‘Default Room’) and joins it if found, otherwise it creates a new room and then joins it. We also use the RoomOptions argument to set the maximum number of players that can be in the room at any one time.
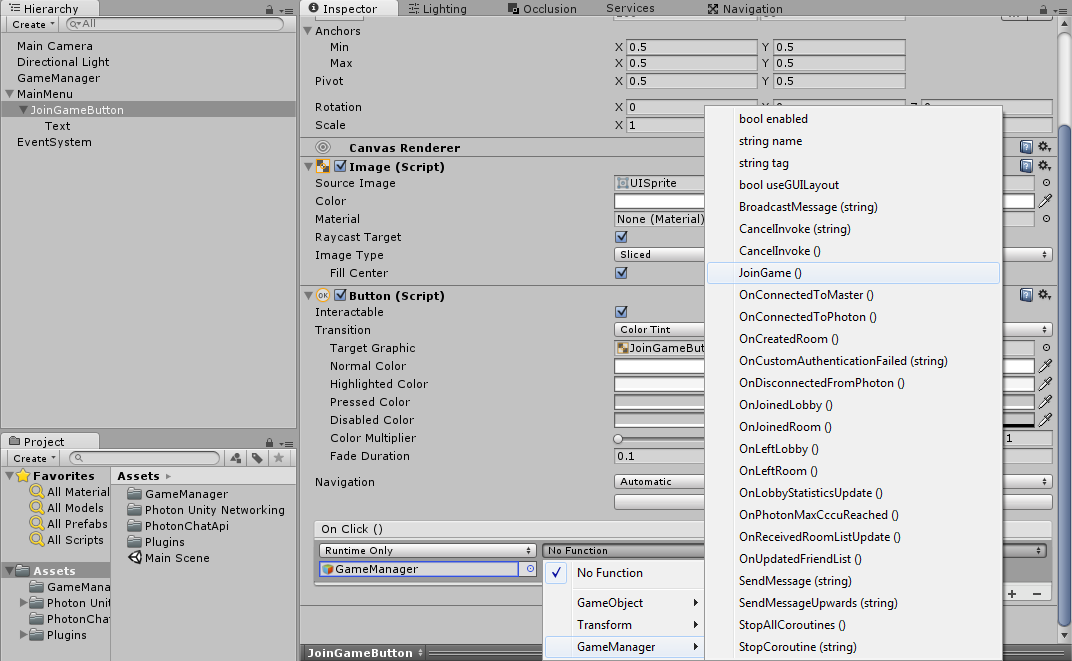
Now we want to hook this function up to the OnClick event on our JoinGameButton, so click the + button to add a new event handler, drag the GameManager onto it and select the JoinGame function as so:-
The final part of this step, is to create a function that executes when we have successfully joined the room, so add this function to the GameManager script:-
For now this will just print a debug string to notify us that we have joined the room, but in the next part of the tutorial we will use it to load the game scene and player character.
This is the full GameManager script so far:-
Save this and run the game and when you click the Join Game button you should see a debug output that says ‘Joined Room’, not very exiting yet I grant you, but at this point you are effectively running a networked game. If you build and run two instances of the game they will both be connected with each other, although currently there will be no obvious evidence of this. (NOTE: You may need to wait 4-5 seconds after you run the game before you click the Join Game button, otherwise you may get an error. Part 4 of the tutorial makes a change which prevents this from happening.)
In a later part of the tutorial we will set up a game browser so you will be able to see a list of currently available games which you can join, or if you create your own game, other people will be able to see it listed and join it.
In the next part we will cover loading the game scene and spawning and controlling the player character, so hope to see you next time.
Download Complete Project for Part 2 (Photon Demo folder deleted to save space).